
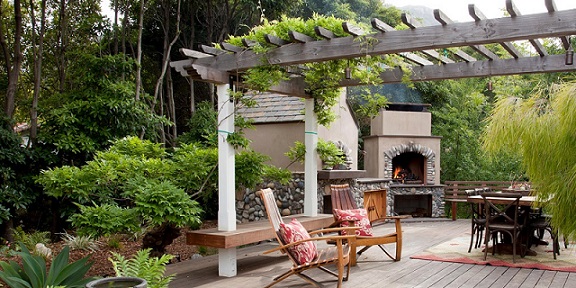
Almost all modern gardens nowadays incorporate a pergola. Available in a wide range of models designed from different materials, the wooden one is the best suited to add a singular touch to the outdoor space.
So, in order to shelter from UV rays while enjoying the sun, a wooden pergola is a must. Want to build one? Find out all the steps to do it right in this article on how to build a pergola on an existing deck.
Building a pergola: the necessary tools and prerequisites
To build a pergola, some tools are essential before starting the construction. First, make sure you have several stakes and a rope to prepare the ground. After that, you will need to have a few 2-notch sleepers and some concrete already mixed. As for the different types of pergola wood, you will need slats and posts to ensure the assembly.
Now that you have the essential equipment to design your pergola, you’ll need to focus on the basic tools. In this case, you will need: a hammer, a handsaw, a wood bit, a pencil, a spirit level and a tape measure.
Once you have the tools, you will need to determine the length of the pergola to be built. If necessary, draw a covered wood pergola plan on a piece of paper. If you are in need of inspiration, you can find models on the internet.
Moreover, there is no shortage of ideas on the web, whether it is a small pergola or a corner pergola. You should also know that a pergola, regardless of the model you choose, should be composed of 3 distinct parts: the uprights, the crosspieces and the slats.
Once you have determined the model that best suits your needs and the configuration of your garden, remember to clearly delineate the construction area. To do this, use stakes and a rope.
Keep in mind that the separation of the uprights should not exceed a scale of 1.5 m for full stability. The more this distance is respected, the less risk of collapse there will be.
The explaining video below shares more details about building a pergola on a deck.
Pergola on deck: making the holes
Who says to make a wooden pergola says to make a lot of holes, it is a matter of course. In this regard, you will have to start by digging a hole 50 cm deep. If the posts are long enough, you can go up to 1 meter.
To fix the poles properly, remember to equip yourself with adequate supports. These must be pointed for a better insertion. In this context, it would be better to use metal supports, which guarantee more solidity and stability. For the height, 200 cm is enough for a standard arbor.
Building a pergola: fixing the posts
When you have finished digging the holes for the posts, it is now time to think about inserting the fixings to make a pergola. In fact, prepare mortar. To do this, mix cement with water. The amount of water needed will be half a bucket.
Then proceed to the placement of the posts in the respective holes. Fix them with bricks or rubble or cleats. If necessary, pour in the prepared mortar. Apply this procedure to all the holes for the posts. Also, make sure that each post is placed vertically. Once this is done, let it sit for 24 hours. The ideal curing time is 24 hours.
After the cement has set, be sure to check that the level of each post is the same. How do you do this? By using a string and a spirit level. Starting with the shortest post, it will be easier to identify the ones that stick out. If you notice that a post is higher than the others, consider sawing it.
You also have the option of securing the poles with brackets specifically designed for the purpose. Simply install the brackets on each hole and insert the posts inside. For this type of solution, dowels, screws and a wrench will be of great help.
Don’t forget to check the bubble level of each post. It is also important to know that supports with wedges are more suitable if the location of posts on the ground seems unstable. To do this, remember to press the bracket into the hollow. This way, the post will be able to be inserted into it.
Battens and crossbars
The next step will be to move on to the battens and rails. They can be attached to the wall of your house or to the posts. Whatever your preference, take your marker to mark the position of each batten. Also consider the spacing of the screws, which should be 4 mm. Then, drill holes in each marker and tighten them with washer lag screws.
For the crosspieces, the spacing to be respected is about 50 cm. And because quality and aesthetic standards must be taken into consideration, remember to saw off the ends of the crosspieces.
Finishing and maintenance
Now that your pergola is assembled, the last step will be to proceed with the finishing touches. This will consist of sanding the wooden pergola with sandpaper. You should also not neglect to apply a touch of cellulose paint, including varnish or stain. This is to strengthen the structure of your pergola. As for maintenance, a coat of varnish every two years will be welcome. Remember also to use fungicides if ever fungus grows on it because of humidity.
Frequently Asked Questions
Can a deck support the weight of a pergola?
Well-maintained wood planks, plastic, and composite, as well as decks made of stone or concrete, are sturdy enough to support a modern pergola. While you can install one on almost every deck or patio surface, the easiest are those that are stable and low to the ground [1].
What is the cheapest way to build a pergola?
Make use of existing garden structures to cut down on timber. Another option for your cheap pergola ideas is to make use of an existing fence or wall as part of your design. This means you end up buying less timber for your pergola project, which can make it much more affordable [2].
Why use a pergola instead of a roof?
A pergola extends your living space and increases the amount of time you can spend outside. Designed and oriented correctly on your lot, a pergola can cast enough light shade to make even a warm afternoon enjoyable or if you still need additional protection, you can install a retractable shade cover for more shade [3].
References
[1] https://outdoorelementsusa.com/blog/can-my-deck-support-a-pergola/
[2] https://www.gardeningetc.com/design/cheap-pergola-ideas
[3] https://www.loveyourlandscape.org/expert-advice/outdoor-living/other-outdoor-structures/3-reasons-you-should-consider-a-pergola/